Quickstart Upload Guide
IDBacDB currently allows importing/uploading MALDI-TOF MS data into a private library through two method. This requires users be registered and logged in. Users will first upload their MS data, creating a “draft” library. After this has been processed, users will be able to upload metadata including MALDI details, Cultivation, Isolation, and Taxonomy data.
Sample sqlite, mzml.zip and metadata files can found in our public Google Drive.
Upload Size Limit
Due to the current technical limitations of the web platform, our app will not allow submission of files greater than 500 MB.
Note: Users currently are unable to make their data public. This feature is coming soon! Users will also be able to organize libraries into custom groups to be able to more easily share with specific users.
Under the hood, IDBacDB uses the same codebase as the IDBac desktop app for data processing.
In order to upload data, logged in users will see a “Manage Libraries” link on the Homepage:
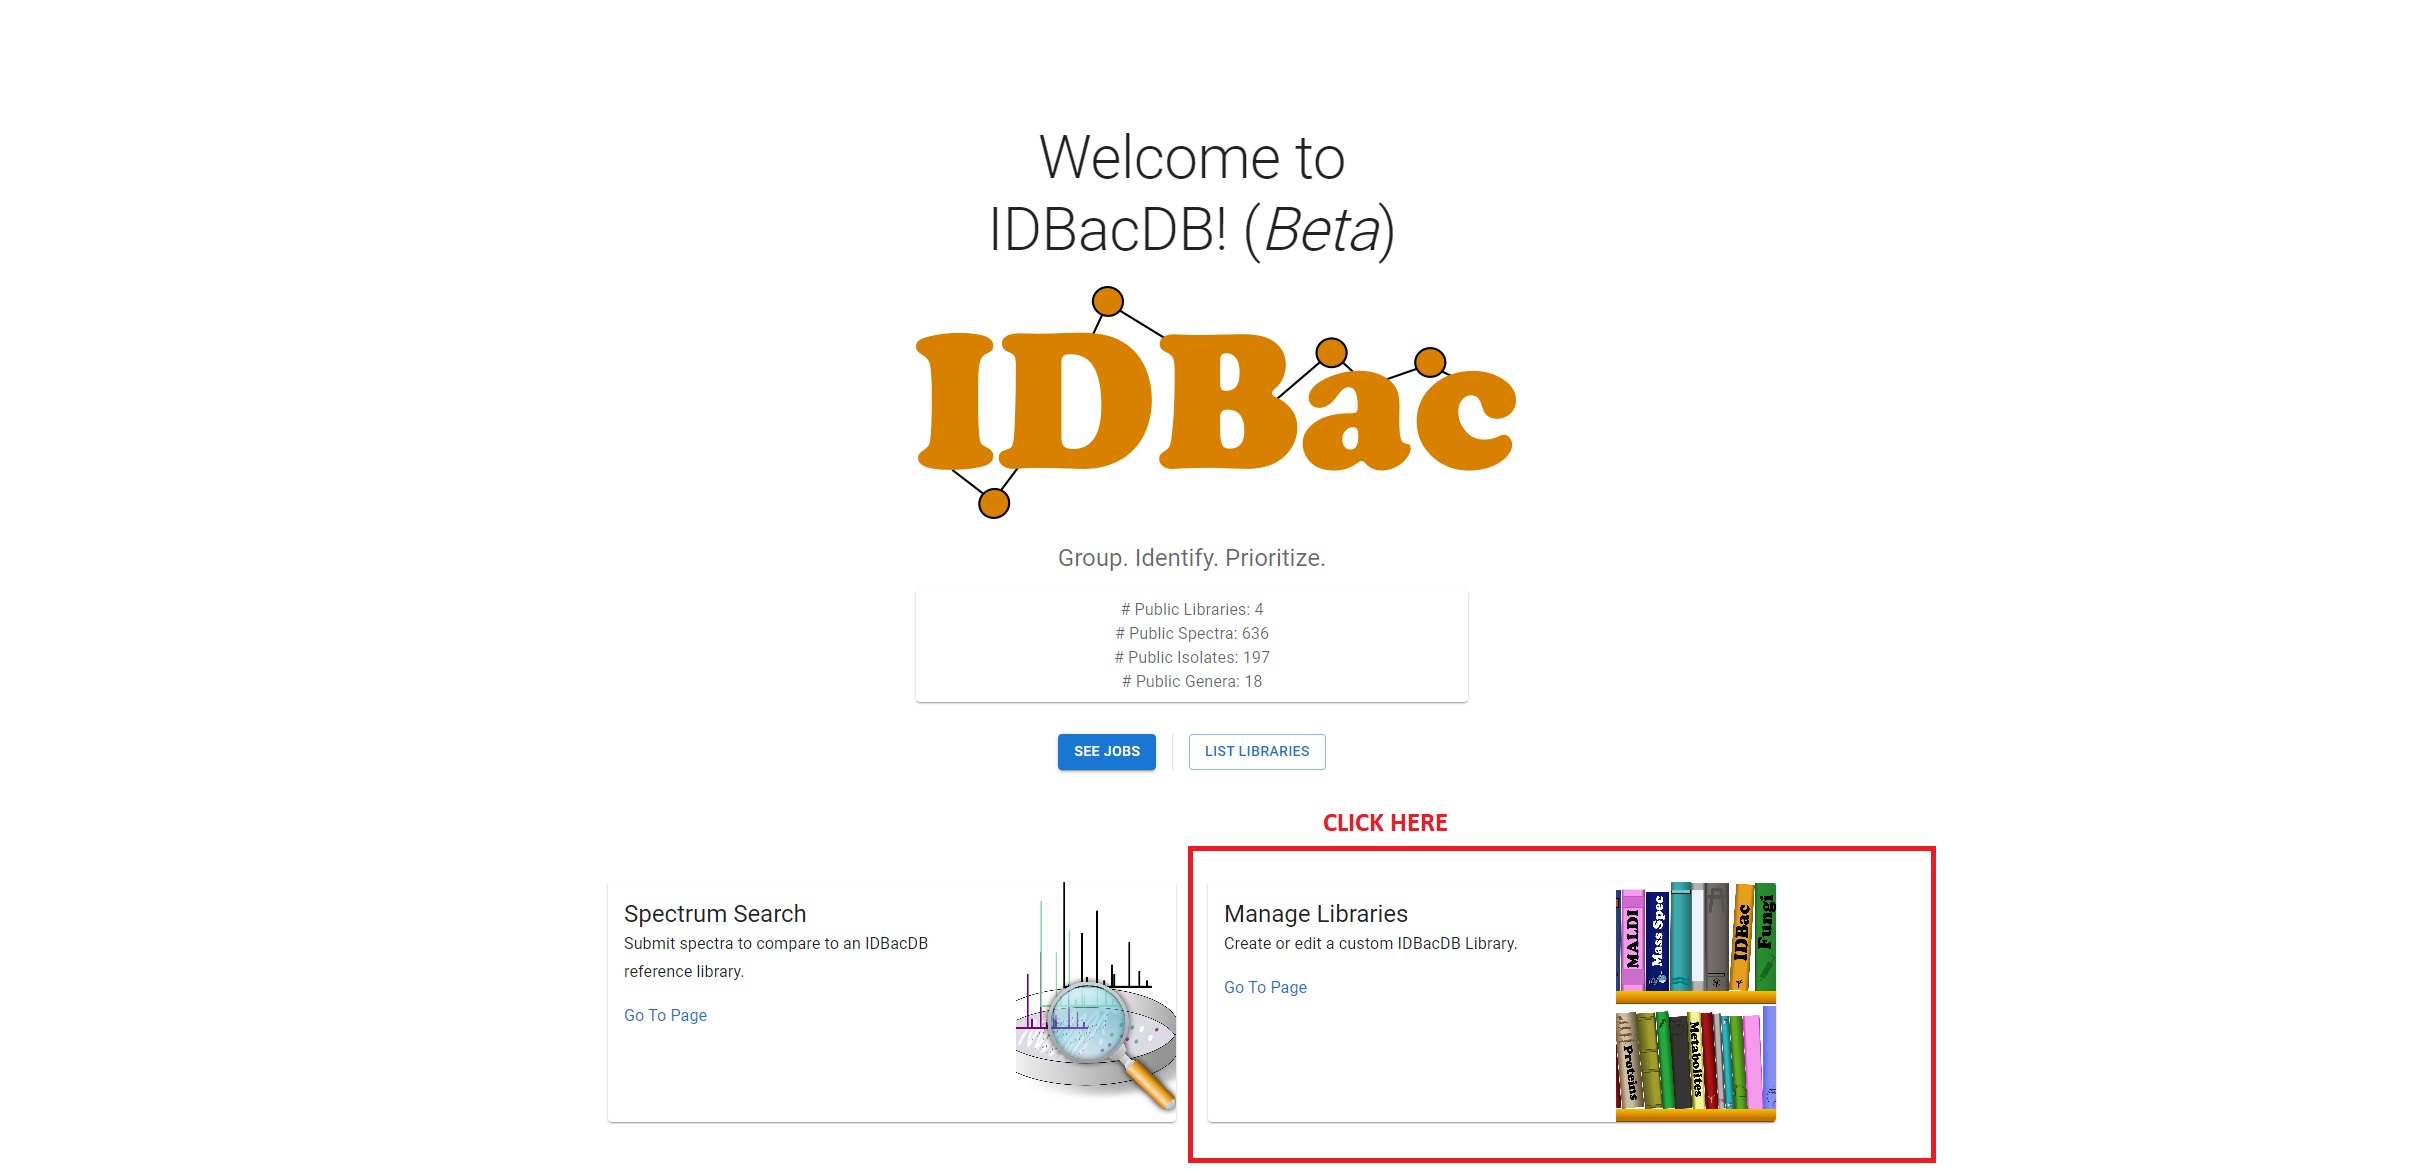
Selecting this will return a page with the two options for uploading data.
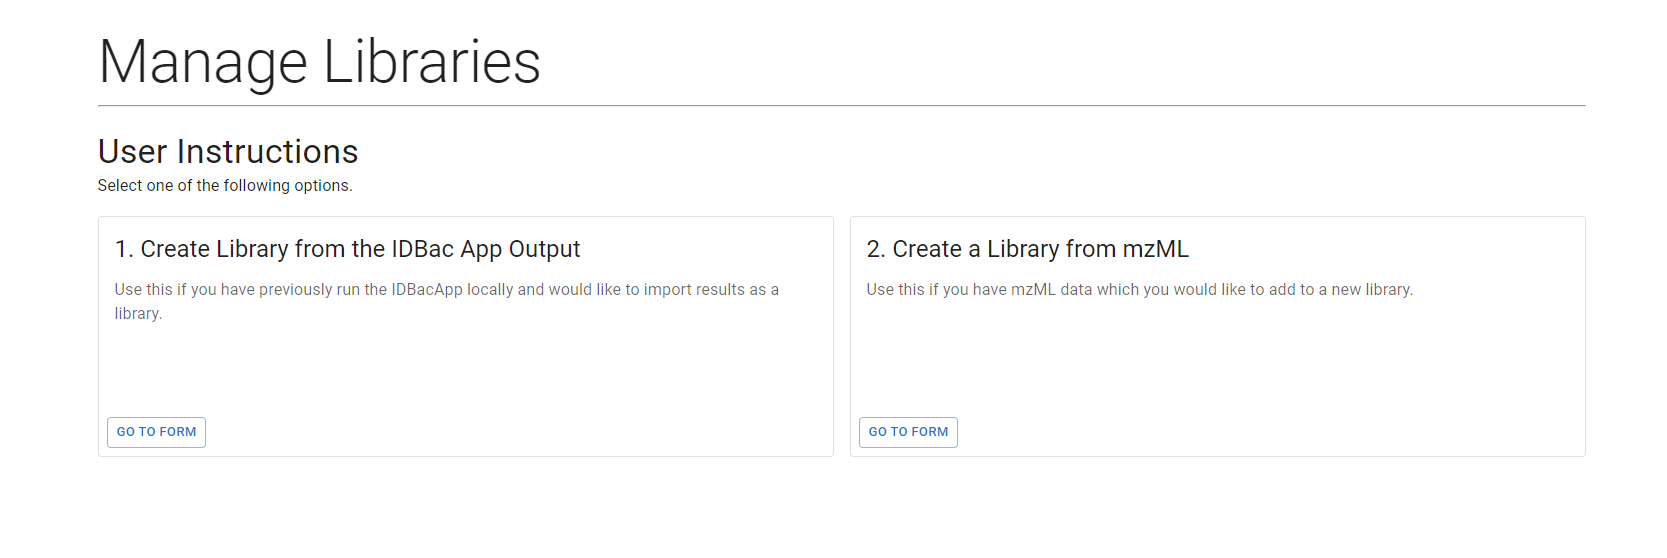
1. IDBac App Output Import
Users of the IDBac Desktop App who have previously performed analyses on protein datasets are able to import the output from the app. These files come in the for of a .sqlite file and should be named according to the experiment name you specified during the application. I.E. if you used the name “pnas_freshwater_sponges” for your experiment, then the output file will be named pnas_freshwater_sponges.sqlite.
The form to upload these data takes in a single .sqlite file and a name for the library.
Select the “+ Upload File” button and select a file through the provided file chooser. Fill in the “Library Name” field and you can then press the submit button.
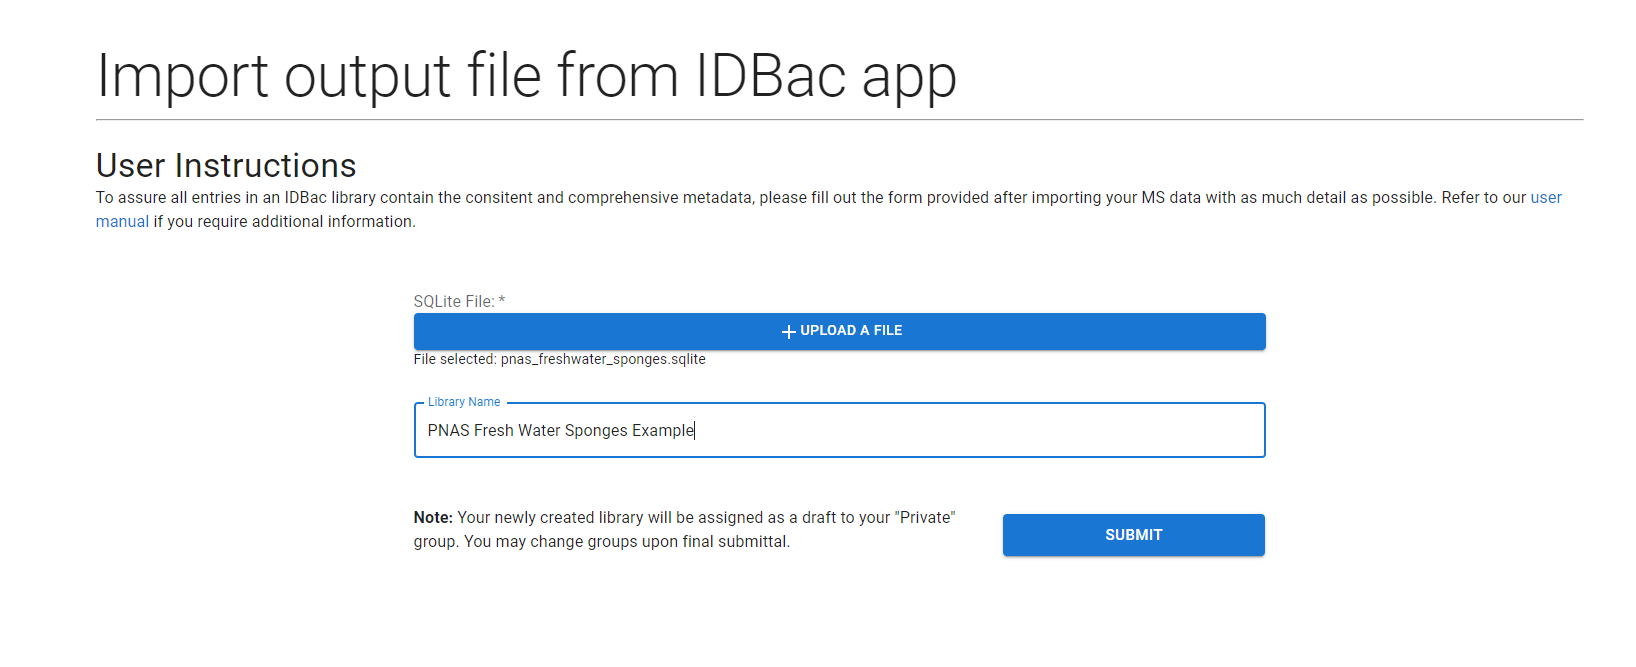
This will redirect you to the Job Tracker, when your job will be processed in the background.
2. mzML Import
The form to upload these data takes in a SINGLE .zip file and a name for the library. Note the contents of your zipfile will be validated. We required that the zipfile ONLY contains .mzML files or sub-directories containing .mzML files. Note: Strain/Isolate names are detected directly from the names of your mzML files. Your files should be named according to the strain/isolate they identify. I.E. Strain-1.mzml maps to “Strain-1”, Strain-1_replicate_information.mzml maps to “Strain-1_replicate_information”. If you would like to include replicates for your strains, please organize them into sub-directories within your zipfile. Also note that “Strain name” can be changed during metadata import, however they will NOT be merged in the DB if two names are identical.
Select the “+ Upload File” button and select a file through the provided file chooser. Fill in the “Library Name” field and you can then press the submit button.
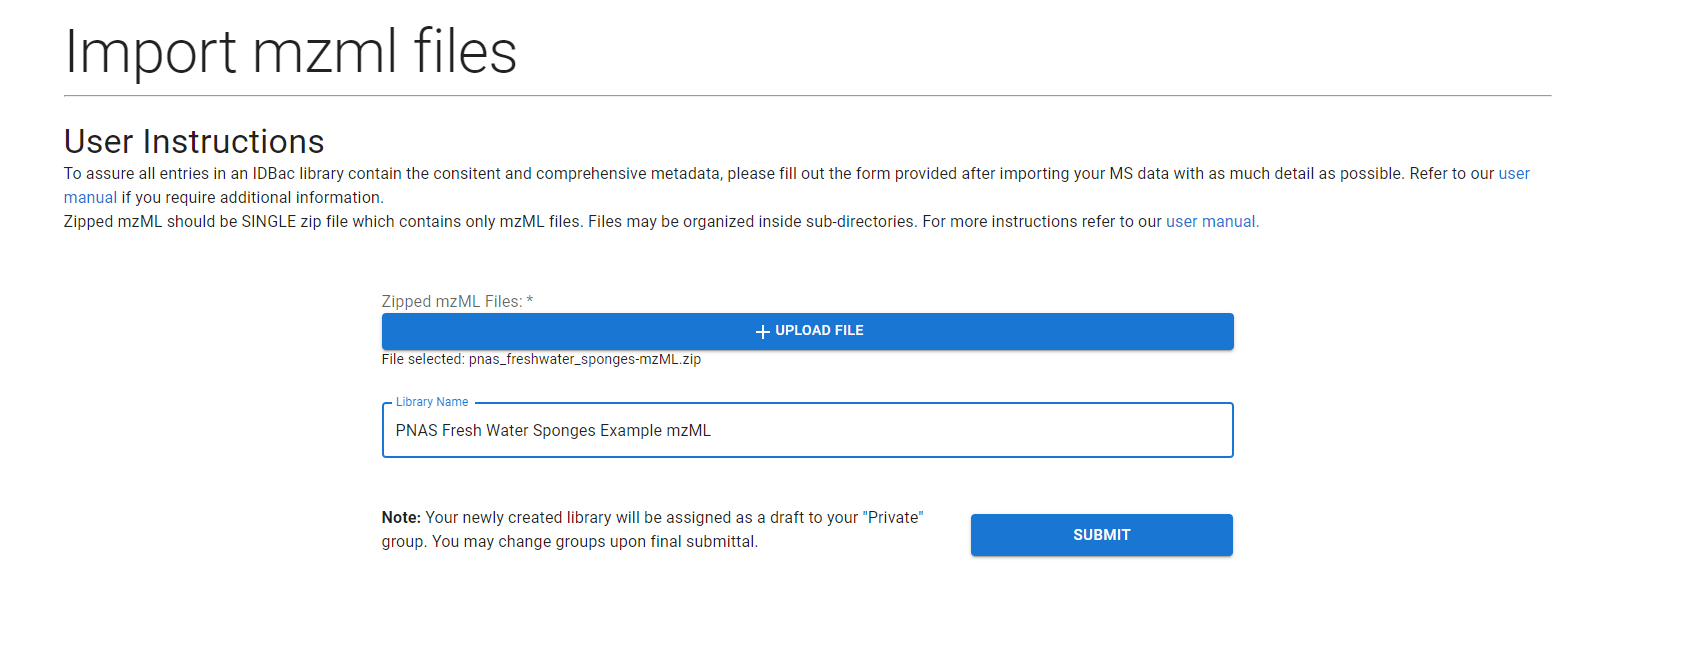
This will redirect you to the Job Tracker, when your job will be processed in the background.
Job Tracker
Once redirected to the Job Tracker you should see the progress of your Job. (Note: somes jobs may appear as not available at first. This should resolve itself quickly.) This page will show the status of either “Queued”, “Running”, “Failed”, or “Completed”. Once completed, your job will show you the next available processing or output step.
In the case of uploading MS data, you will be prompted to proceed to the “Import Metadata” step once your MS data has been processed.
Running Job
![]()
Finished Job
![]()
Import Metadata
The “Import Metadata” page will allow you to download a Excel file template. (Note this file has been tested both with Microsoft Excel and LibreOffice). This file contains two sheets. The first sheet “Instructions” lists all the available columns in the “Data” sheet, describes if they are required or optional, and provides a sample value. The “Data” sheet is where you will fill in the required data for all the strains/isolates you that have been detected based on your mzML file names.
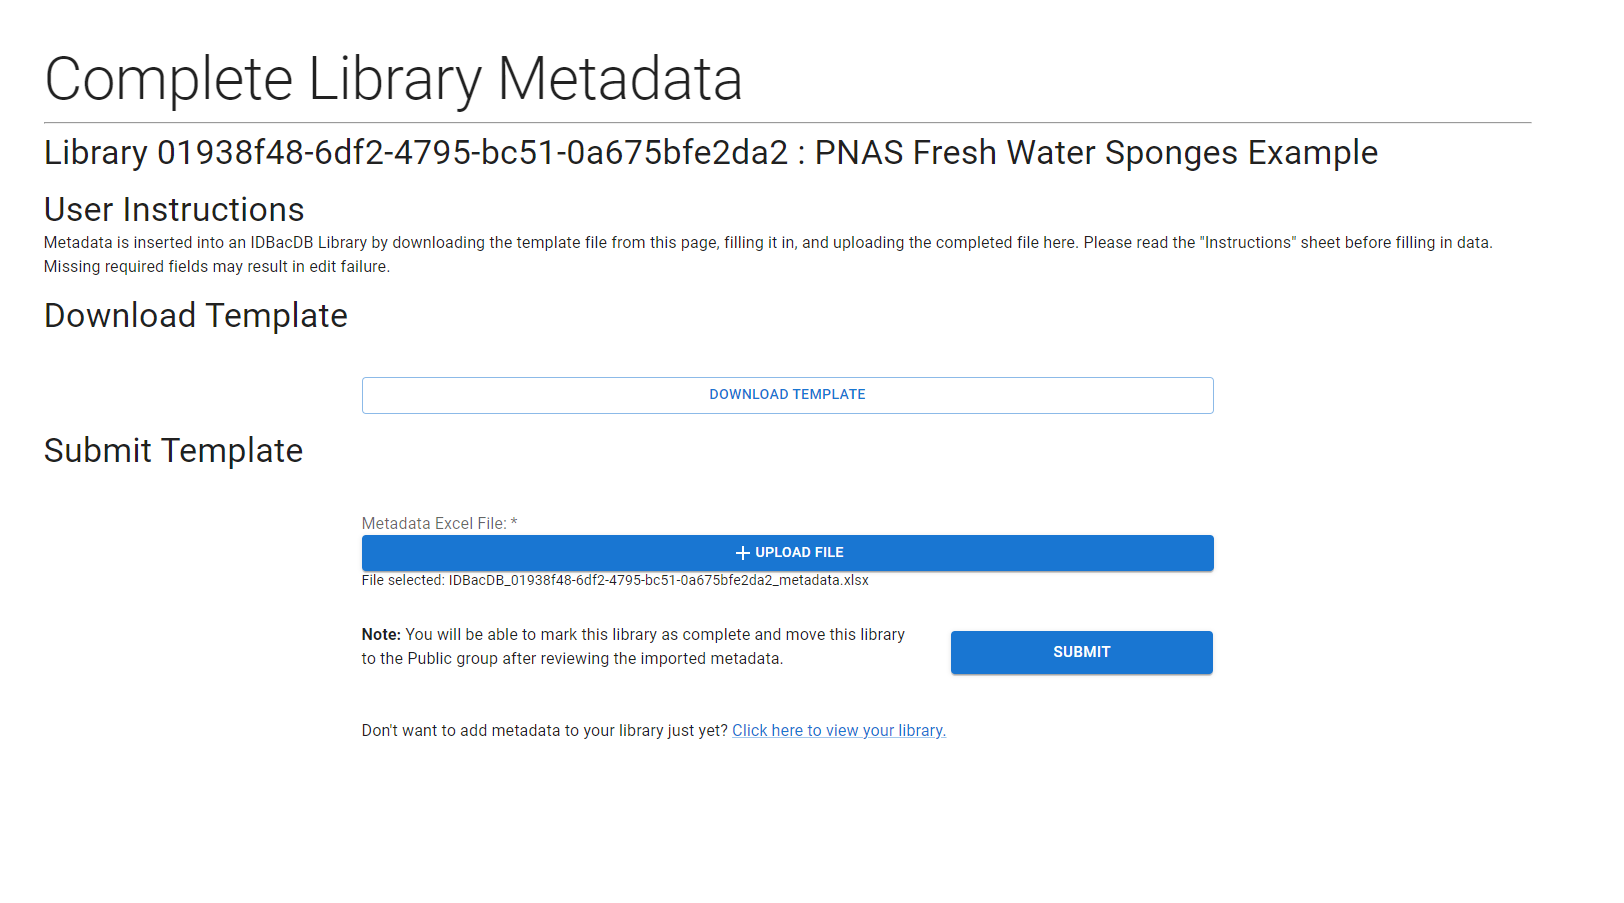
Renaming the data sheet will result in import failure. Editting the column names in the “Data” sheet will result in import failure. Please download the file and fill it in with the most complete information possible if you intend share your library. You can include genetic and taxonomic information in the metadata by linked to GenBank and NCBI Taxonomy, respectively. See instructions for getting “NCBI taxid” in the NCBI Taxonomy Docs.
Select your completed file for upload and press submit. You will once again be redirected to a Job Tracker.
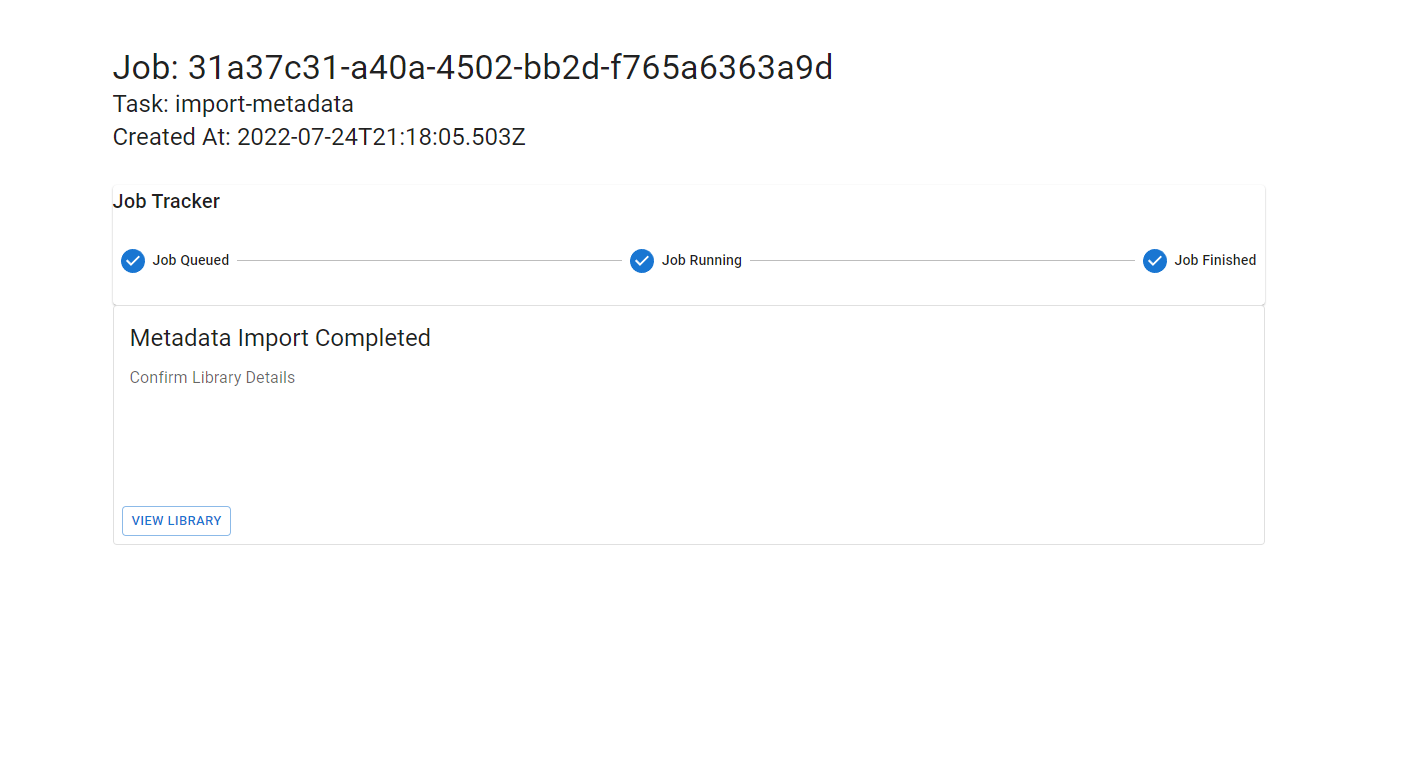
Once your metadata has been imported, you will be prompted to view and review your library.
Review
You library will at this point be marked as a “draft”.
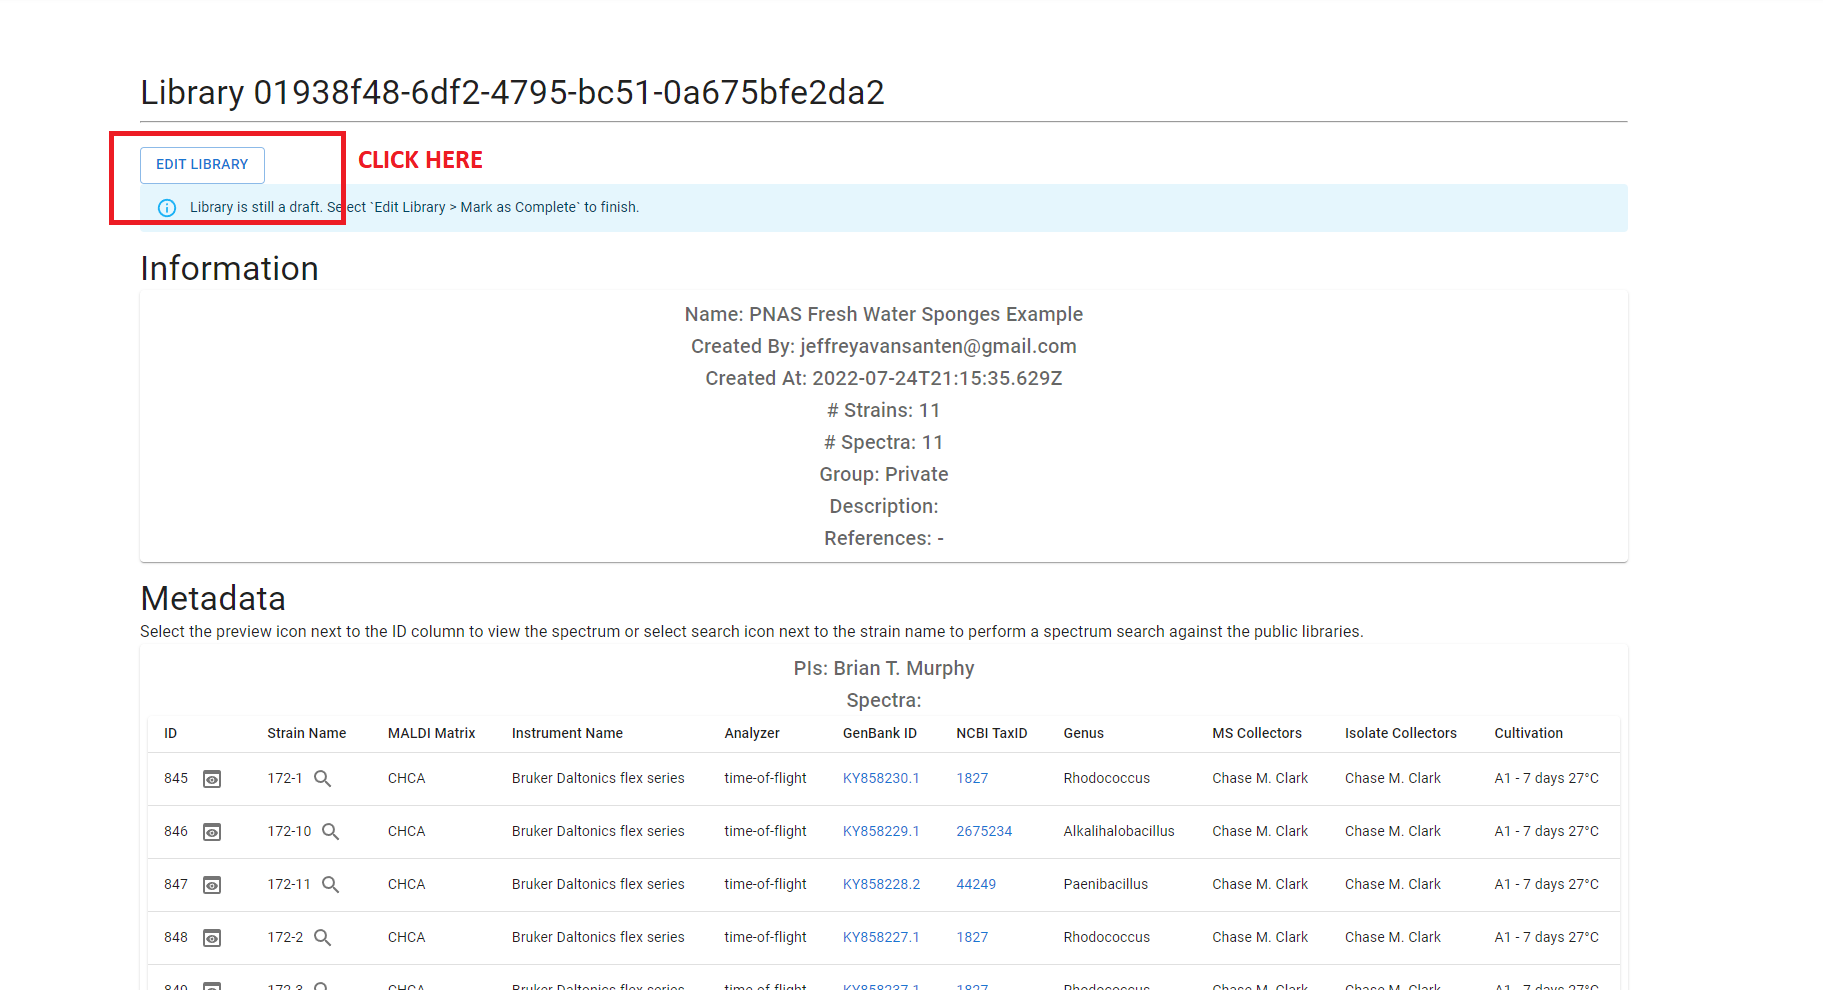
If you need to make changes to your library, you can do so via the “Edit Library” button at the top of the page. This will provide three options:
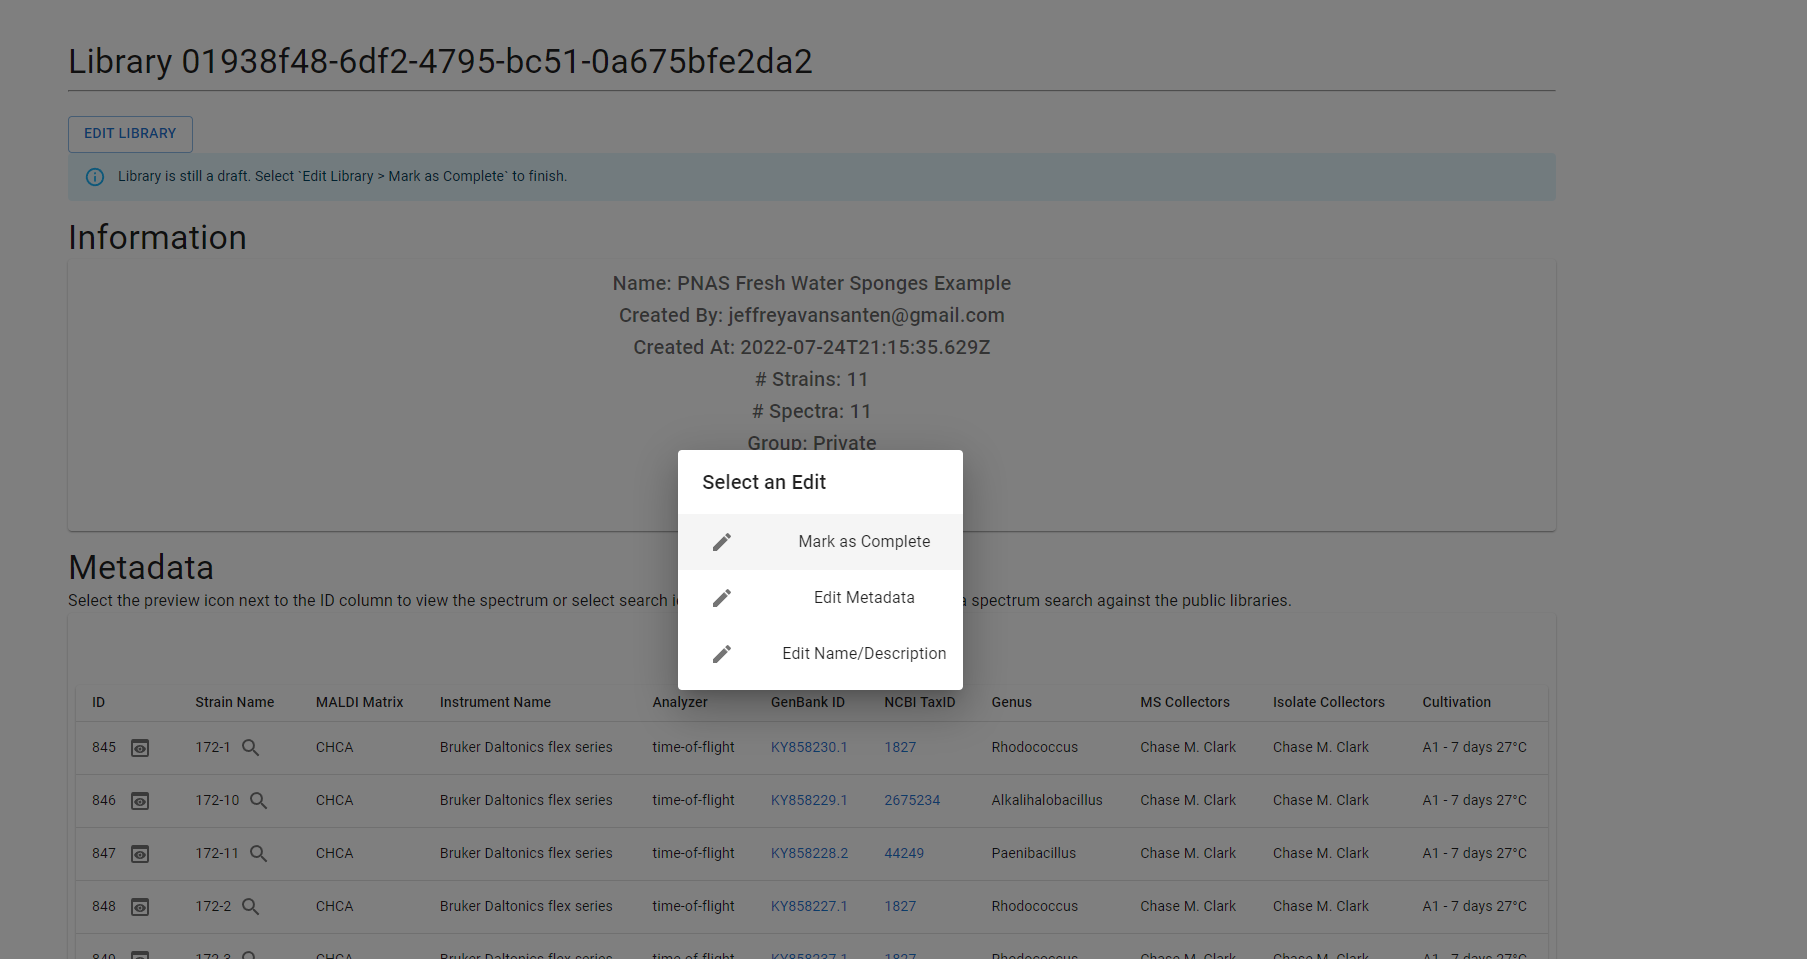
- Mark as Complete
- Edit Metadata
- Edit Name/Description
If you are satisfied with your library you may select the “Mark as Complete” option. In the future this will enable you to move the library to other groups for sharing.
If you’d like to edit the metadata listed on the library page, select the “Edit Metadata” option where you will be prompted to “Import Metadata” as before.
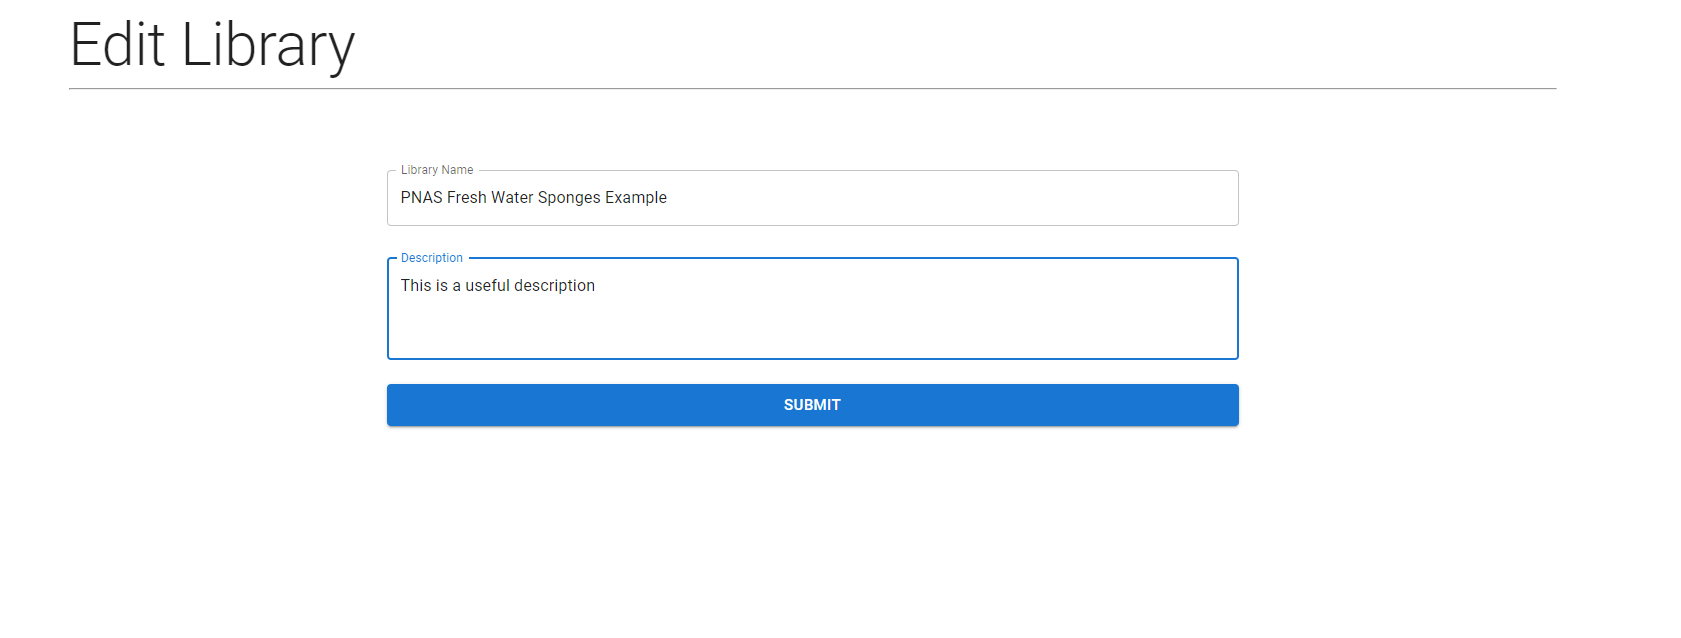
If you’d like to rename your library or add a description, you can select the “Edit Name/Description” option. This will redirect you to another form which allows you to edit these details. Future versions will also allow you to associate refereneces with the library via a DOI.
You’re Done!
Now that you have a complete library, you can easily browse the data! You can view the spectra, and search public libraries directly from the “Library Page”.